> ## Documentation Index
> Fetch the complete documentation index at: https://docs.opai.today/llms.txt
> Use this file to discover all available pages before exploring further.
# Quick Start
> Create your first Java Extension
The client provides full Java runtime support and runs standard Java bytecode.
By default, the client uses **Java 21**. You can compile with Java 21, but if you want to ensure compatibility with older launchers, you may also compile with Java 8.
## Development Tools
We recommend using IntelliJ IDEA or Eclipse for development:
* [Download IntelliJ IDEA](https://www.jetbrains.com/idea/download) — the Community Edition is recommended (scroll down; the first link is Ultimate)
* [Download Eclipse](https://www.eclipse.org/downloads/)
## Set up SDK and Workspace
We recommend using [Zulu 21](https://cdn.azul.com/zulu/bin/zulu21.44.17-ca-fx-jdk21.0.8-win_x64.zip) as your SDK.\
If you want to develop Java 8 extensions, use any JDK 8 distribution.
Once Java is ready, clone or download the [example extension](https://github.com/opai-client/example-extension) and import it into your IDE.\
If you have Git installed, you can clone with:
```bash theme={null}
git clone https://github.com/opai-client/example-extension.git
```
Maven should automatically configure the project. After configuration, you can start editing code.
## Packaging
Before you begin editing, change the package name of the example extension and update the `name` field in the `@ExtensionInfo` annotation inside `ExampleExtension.java`.
Many users install this example extension for testing purposes — modifying these values avoids conflicts.
After editing, you can build the JAR using the Maven sidebar in IntelliJ IDEA and selecting the `package` command.
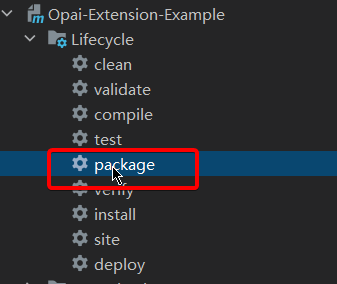 Once built, the JAR will be generated in the `target` directory.
Copy this JAR file into the `%appdata%\Opai\extensions` folder to load it in the client.
## Debugging
In the client, you can reload extensions using:
```bash theme={null}
.extension reload
```
This reloads all extensions. After editing code, repackage and use this command to test quickly.
For debugging without repackaging, look into JDWP (Java Debug Wire Protocol) and use your IDE’s debugger.
## Developer Documentation
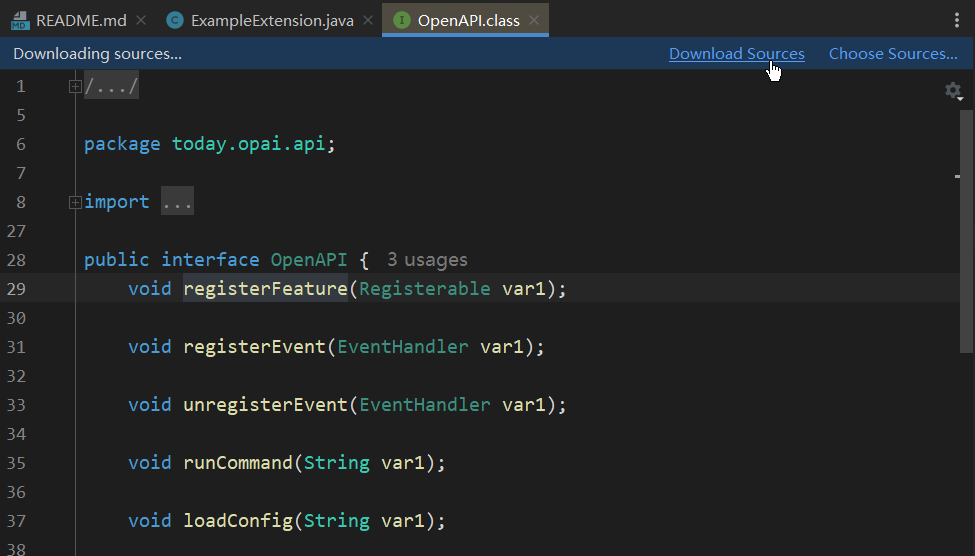
The developer documentation is provided in Javadoc format.
Inside the IDE, you can `Ctrl + Right Click` any API class name, then click `Download Source` to view the Javadoc (only needs to be done once).
Once built, the JAR will be generated in the `target` directory.
Copy this JAR file into the `%appdata%\Opai\extensions` folder to load it in the client.
## Debugging
In the client, you can reload extensions using:
```bash theme={null}
.extension reload
```
This reloads all extensions. After editing code, repackage and use this command to test quickly.
For debugging without repackaging, look into JDWP (Java Debug Wire Protocol) and use your IDE’s debugger.
## Developer Documentation
The developer documentation is provided in Javadoc format.
Inside the IDE, you can `Ctrl + Right Click` any API class name, then click `Download Source` to view the Javadoc (only needs to be done once).
 Almost every method has detailed comments — simply read the annotations to understand what a method does.